

Today I'm sharing one of my favorite tutorials. I love this bag because it is cute, useful and super easy. I have made half a dozen of these and we use them all the time. We use them to store all sorts of collections and they are great when you need to grab a few toys on the way out the door. The idea came from a tutorial I found at Bags for the People.org. Mine are a little different but you can click here to download their easy directions.
If you are new to sewing check your manual for set up instructions. I would demonstrate how but all machines are different plus there are a lot of how-to videos already. This one (here) is a good video if you're interested. For this bag you will only be making ONE zigzag seam.
Materials:
- sewing machine
- thread
- old t-shirt
- ribbon/cord
- safety pin
- scissors
- seam ripper (optional)
Ready? Here we go.

- Find an old t-shirt from the bottom of your drawer. This one was in good shape but never gets worn. I also grabbed it because the stripes make cutting and stitching that much easier for a first time sewer. Kids shirts make a nice size bag but use what ever you have.
- Cut straight across under the arms.
- Turn your 'tube' inside out.
- Select a zigzag stitch. Many machines have a dial for this.
- Pull the threads to the back of the machine and position cut edge of the shirt under the needle. I like to line the shirt up with the edge of the presser foot. This gives you about a 1/2 inch seam allowance. Lower the presser foot and begin to sew.
- To strengthen the seam backstitch after the first few stitches by reversing the needle. My machine has a button but you may have to look yours up in the manual.
- Continue stitching across the shirt. Be patient. Don't pull or push the fabric let the machine do the work. Use your hands to keep the fabric straight.
- When you get to the other end of the shirt backstitch then sew right up to or even off the edge. Release the presser foot and pull the shirt out 4 -5 inches then cut your threads. This gives your machine extra thread so you don't have to thread it again.
- That's it. Your done sewing.

That is unless you missed some spots like us. That happens, no biggie. Just go back and stitch over the hole. You don't need to do the entire seam again.

Now lets finish that bag!
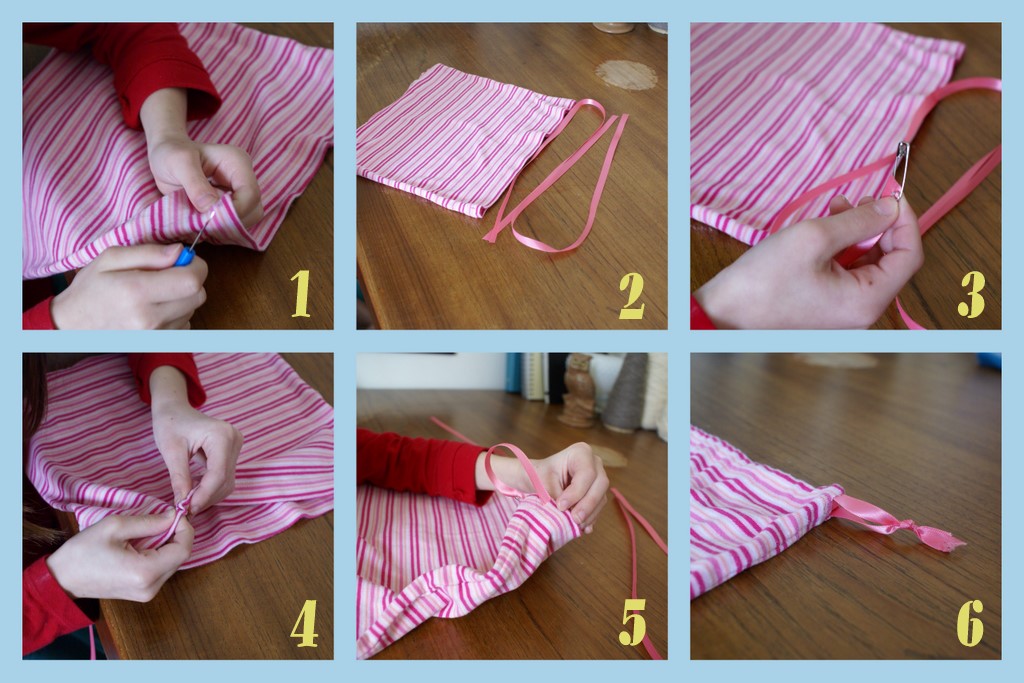
- Turn the bag right side out and make 2 small holes (1/4 inch) on either side of the seam at the open end of the bag. Use a seam ripper or small pair of scissors to cut through the top layer of fabric. This was the bottom of your t-shirt if you got turned around.
- Cut two pieces of ribbon double the width of the bag.
- Attach the safety pin to the edge of the ribbon.
- Work the safety pin and ribbon around the entire bag so both ends end up on the same side. You will be going out and back in the holes at the other end for the shirt. Remove the safety pin and tie a knot.
- Do the same with the other ribbon but this time start and end at the other side of the bag.
- Remove the safety pin and tie a knot.

Let me know if you are going to give it a try and ask away if you have any questions.
2 comments:
I love how easy this is and am definitely going to try it this weekend. Samantha loves bags and she has so many things I would like to have organized better. :)
Go Ava!!! Looks great!
Post a Comment