A Green Guide to Fabulous Crayons
How to make cool new crayons from yucky old ones.

This is a fun project for kids and adults to do together. Please read the directions all the way through before starting.
Materials you will need:
Old crayons
Plastic tablecloth
Knife
Cutting board
Disposable muffin tins
Foil
Cooking sheet or Roasting pan
Toothpicks
Candy molds
Oven
Freezer
Crayons roll. If you are a parent, you have crayons under the couch, in the back of drawers and at the bottom of the toy box. Get your little ones to gather them up and have them help you transform them into new fabulous crayons they won’t want to lose track of.

Cover it up. I protect my working surface with a plastic tablecloth I purchased from the dollar store. This catches the tiny crayon pieces and even the hot wax if I get a little messy. When I’m finished I wipe clean, fold and store for next time.

Sort it out. I sort all my crayons first however, this step depends on how many crayons you are working with at one time. You may want to peel and sort as you go. You can use anything from plastic bags to recycled butter tubs to organize your crayons. I found that disposable food containers are a good size for me.

Peel baby. This is my least favorite part of the process. I use an old knife to make a slit down the length of the crayon paper. This requires cutting and should be done by an adult. I do think little fingers make for the best peelers though. Some papers will pop right off, while others take a little more work. I have surrendered more than one crayon to the trash. You can’t win them all.

Snap and bake. Preheat oven to 215 degrees. Take your now naked crayons and snap into approximately 1 inch (3 cm.) pieces. To melt my crayons I use disposable muffin tins. I cut these apart so they can be poured one at a time. I fill my tins close to the top to make several crayons at one time. I also use all the same color crayon for the most even results (for crayons with mixed colors see directions for crazy crayons that follow). Candy molds will vary in size.

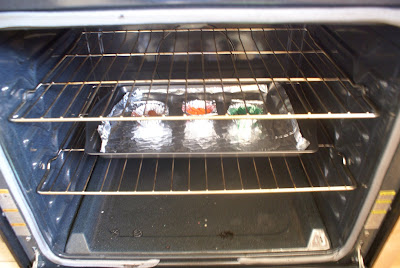
Watch them melt. Place muffin tins on a baking sheet or roasting pan lined with foil. Once inside, turn on your oven light and watch the crayons change from a solid to liquid. A great little science experiment that takes 10-15 minutes.
 Hot stuff! After your crayons have melted remove from the oven. I let them cool for a minute or two until I can pick them up with my hands. This is another grown up job but kids love to watch. Pick a mold and pour. I fill all the way to the top. It can get a little messy but once the crayon cools you can snap off any parts that ran over.
 Chill out. Now that you have filled your mold let them sit 2-3 minutes until firm. Once the top no longer moves they are safe to transfer. Find a flat spot in your freezer to set the mold on. Let your crayons get nice and hard, 10-15 minutes before removing from the freezer.
Pop! Kids love this part. Flip your mold over and the crayons will pop right out. Remember, they are still just crayons and can break so try not to drop them too far.

Enjoy! Don’t worry if they don’t come out perfect the first time. You can always melt them again.

7 comments:
Cute and useful tutorial! The new crayons are adorable.
Great tutorial. I love the idea of recycling old crayolas.
Happy Holidays,
Franniesheart.etsy.com
What a fun project, thanks for sharing!
Great tutorial - thanks for sharing!
I love this and you make it sound such fun!
What a great tutorial! Thanks so much for sharing!
Vicki
Soak the crayons in water and the papers come right off!
http://nkdolin.blogspot.com/2008/02/best-valentines-ever-melted-heart.html
Post a Comment